※ これは 2018/11/02 Unity 2018.3.0b8 時点の情報です
最新版では動作が異なる可能性がありますのでご注意ください
前回は引っぱり操作を矢印として描画しました
今回はさらにボールの発射後の軌跡を予測して下記のように描画してみたいと思います

まずは Illustrator で下記のような点線を作成しました
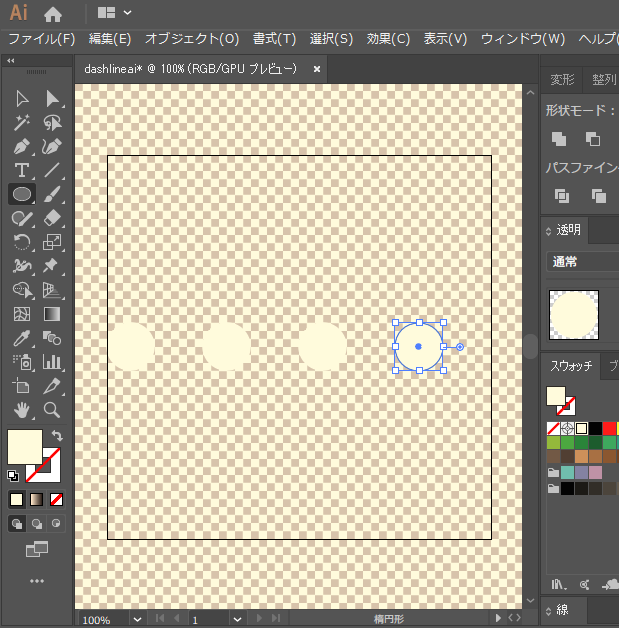
前回と同じく 256 x 256 px の dashline.png という画像ファイル名で Assets 直下に書き出し保存します
UnityEditor に戻ったら、書きだした dashline.png を選択、Import Settings を下記のように変更して Apply ボタンで反映します

変更したのは Alpha Is Transparency へのチェック、Generate Mip Maps のチェック外し、Wrap Mode を Repeat、Max Size 256 といったところ
次に Hierarchy ビューの Ball 直下に GameObject を追加します

Direction より上になるようにして、Simulation という名前にしました
この GameObject には LineRenderer をアタッチし、下記のように設定します

dashline.png をテクスチャに指定した Unlit/Transparent の Material を Materials に設定、Width は 1.0、Texture Mode を元画像を繰り返しつなぎ合わせて描画する Tile にしました
ここまでおわったら Ball.cs を下記のように変更
using System.Collections;
using System.Collections.Generic;
using UnityEngine;

[RequireComponent(typeof(Rigidbody))]
public class Ball : MonoBehaviour
{
    /// <summary>
    /// 物理剛体
    /// </summary>
    private Rigidbody physics = null;

    /// <summary>
    /// 発射方向
    /// </summary>
    [SerializeField]
    private LineRenderer direction = null;

    /// <summary>
    /// 運動軌跡
    /// </summary>
    [SerializeField]
    private LineRenderer simulationLine = null;

    /// <summary>
    /// 最大付与力量
    /// </summary>
    private const float MaxMagnitude = 2f;

    /// <summary>
    /// 発射方向の力
    /// </summary>
    private Vector3 currentForce = Vector3.zero;

    /// <summary>
    /// メインカメラ
    /// </summary>
    private Camera mainCamera = null;

    /// <summary>
    /// メインカメラ座標
    /// </summary>
    private Transform mainCameraTransform = null;

    /// <summary>
    /// ドラッグ開始点
    /// </summary>
    private Vector3 dragStart = Vector3.zero;

    /// <summary>
    /// ボール位置
    /// </summary>
    private Vector3 currentPosition = Vector3.zero;

    /// <summary>
    /// 固定フレームウェイト
    /// </summary>
    private static float DeltaTime;

    /// <summary>
    /// 固定フレーム待ち時間
    /// </summary>
    private static readonly WaitForFixedUpdate WaitForFixedUpdate = new WaitForFixedUpdate();

    /// <summary>
    /// 初期化処理
    /// </summary>
    public void Awake()
    {
        this.physics = this.GetComponent<Rigidbody>();
        this.currentPosition = this.physics.position;
        this.mainCamera = Camera.main;
        this.mainCameraTransform = this.mainCamera.transform;
        DeltaTime = Time.fixedDeltaTime;
    }

    /// <summary>
    /// マウス座標をワールド座標に変換して取得
    /// </summary>
    /// <returns></returns>
    private Vector3 GetMousePosition()
    {
        // マウスから取得できないZ座標を補完する
        var position = Input.mousePosition;
        position.z = this.mainCameraTransform.position.z;
        position = this.mainCamera.ScreenToWorldPoint(position);
        position.z = 0;

        return position;
    }

    /// <summary>
    /// ドラック開始イベントハンドラ
    /// </summary>
    public void OnMouseDown()
    {
        this.dragStart = this.GetMousePosition();
        this.currentPosition = this.physics.position;

        this.direction.enabled = true;
        this.direction.SetPosition(0, this.currentPosition);
        this.direction.SetPosition(1, this.currentPosition);
    }

    /// <summary>
    /// ドラッグ中イベントハンドラ
    /// </summary>
    public void OnMouseDrag()
    {
        var position = this.GetMousePosition();

        this.currentForce = position - this.dragStart;
        if (this.currentForce.magnitude > MaxMagnitude * MaxMagnitude)
        {
            this.currentForce *= MaxMagnitude / this.currentForce.magnitude;
        }

        this.direction.SetPosition(0, this.currentPosition);
        this.direction.SetPosition(1, this.currentPosition + this.currentForce);

        this.StartCoroutine(this.Simulation());
    }

    /// <summary>
    /// 軌跡を予測して描画するコルーチン
    /// </summary>
    /// <returns></returns>
    private IEnumerator Simulation()
    {
        this.direction.enabled = false;

        // 自動的な物理運動を停止させる
        Physics.autoSimulation = false;

        var points = new List<Vector3> { this.currentPosition };
        this.Flip(this.currentForce * 6f);

        // 運動の軌跡をシミュレーションして記録する
        for (var i = 0; i < 16; i++)
        {
            Physics.Simulate(DeltaTime * 2f);
            points.Add(this.physics.position);
        }

        // もとの位置に戻す
        this.physics.velocity = Vector3.zero;
        this.transform.position = this.currentPosition;

        // 予測地点をつないで軌跡を描画
        this.simulationLine.positionCount = points.Count;
        this.simulationLine.SetPositions(points.ToArray());

        Physics.autoSimulation = true;
        this.direction.enabled = true;

        yield return WaitForFixedUpdate;
    }

    /// <summary>
    /// ドラッグ終了イベントハンドラ
    /// </summary>
    public void OnMouseUp()
    {
        this.direction.enabled = false;
        this.Flip(this.currentForce * 6f);
    }

    /// <summary>
    /// ボールをはじく
    /// </summary>
    /// <param name="force"></param>
    public void Flip(Vector3 force)
    {
        // 瞬間的に力を加えてはじく
        this.physics.AddForce(force, ForceMode.Impulse);
    }
}
大事なのは Simulation のコルーチン部分
Physics.autoSimulation = false で自動的な物理運動を停止した状態で、Ball を動かし、移動後の位置を記録、元の位置に戻して LineRenderer の頂点を予測地点にして軌跡を描画しています
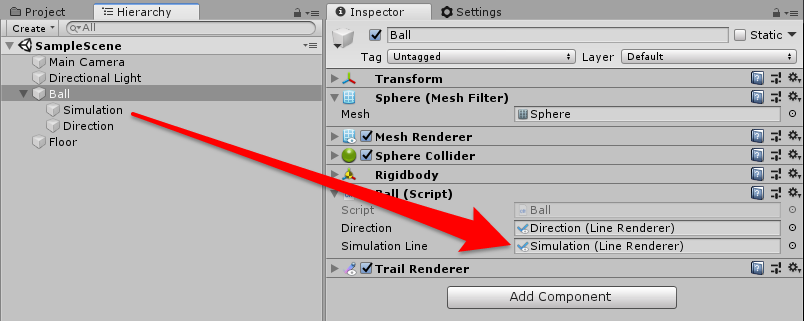
最後に UnityEditor に戻って Ball.cs の SImulation Line に Simulation の LineRenderer を設定
さっそくお試し実行

こんな感じに軌道予測ができました!